
Email and SMTP Setup
Customer emails go out through your own mail provider’s SMTP server. Connect it in Email Settings, then send a test.
- 1Get your SMTP detailsHost, port, username and password from your email provider.
- 2Fill in Email SettingsEnter them under Email → Email Settings and save.
- 3Send a testSend a test email from Templates.
Before you start
Customer emails are on Standard and above. They’re sent through your own mail provider’s SMTP server, from an address on your own domain.
Until SMTP is set up, no customer emails are sent.
Find your SMTP details at the provider where you bought your domain, such as Hostinger or GoDaddy. If you don’t have an address on your domain yet, such as info@yourdomain.com, create one there. Its email settings list the host, port, username and password.
Email settings
Open Email → Email Settings and click "Edit Settings". Fill in the fields, then click "Save Settings". "Cancel" drops your changes.
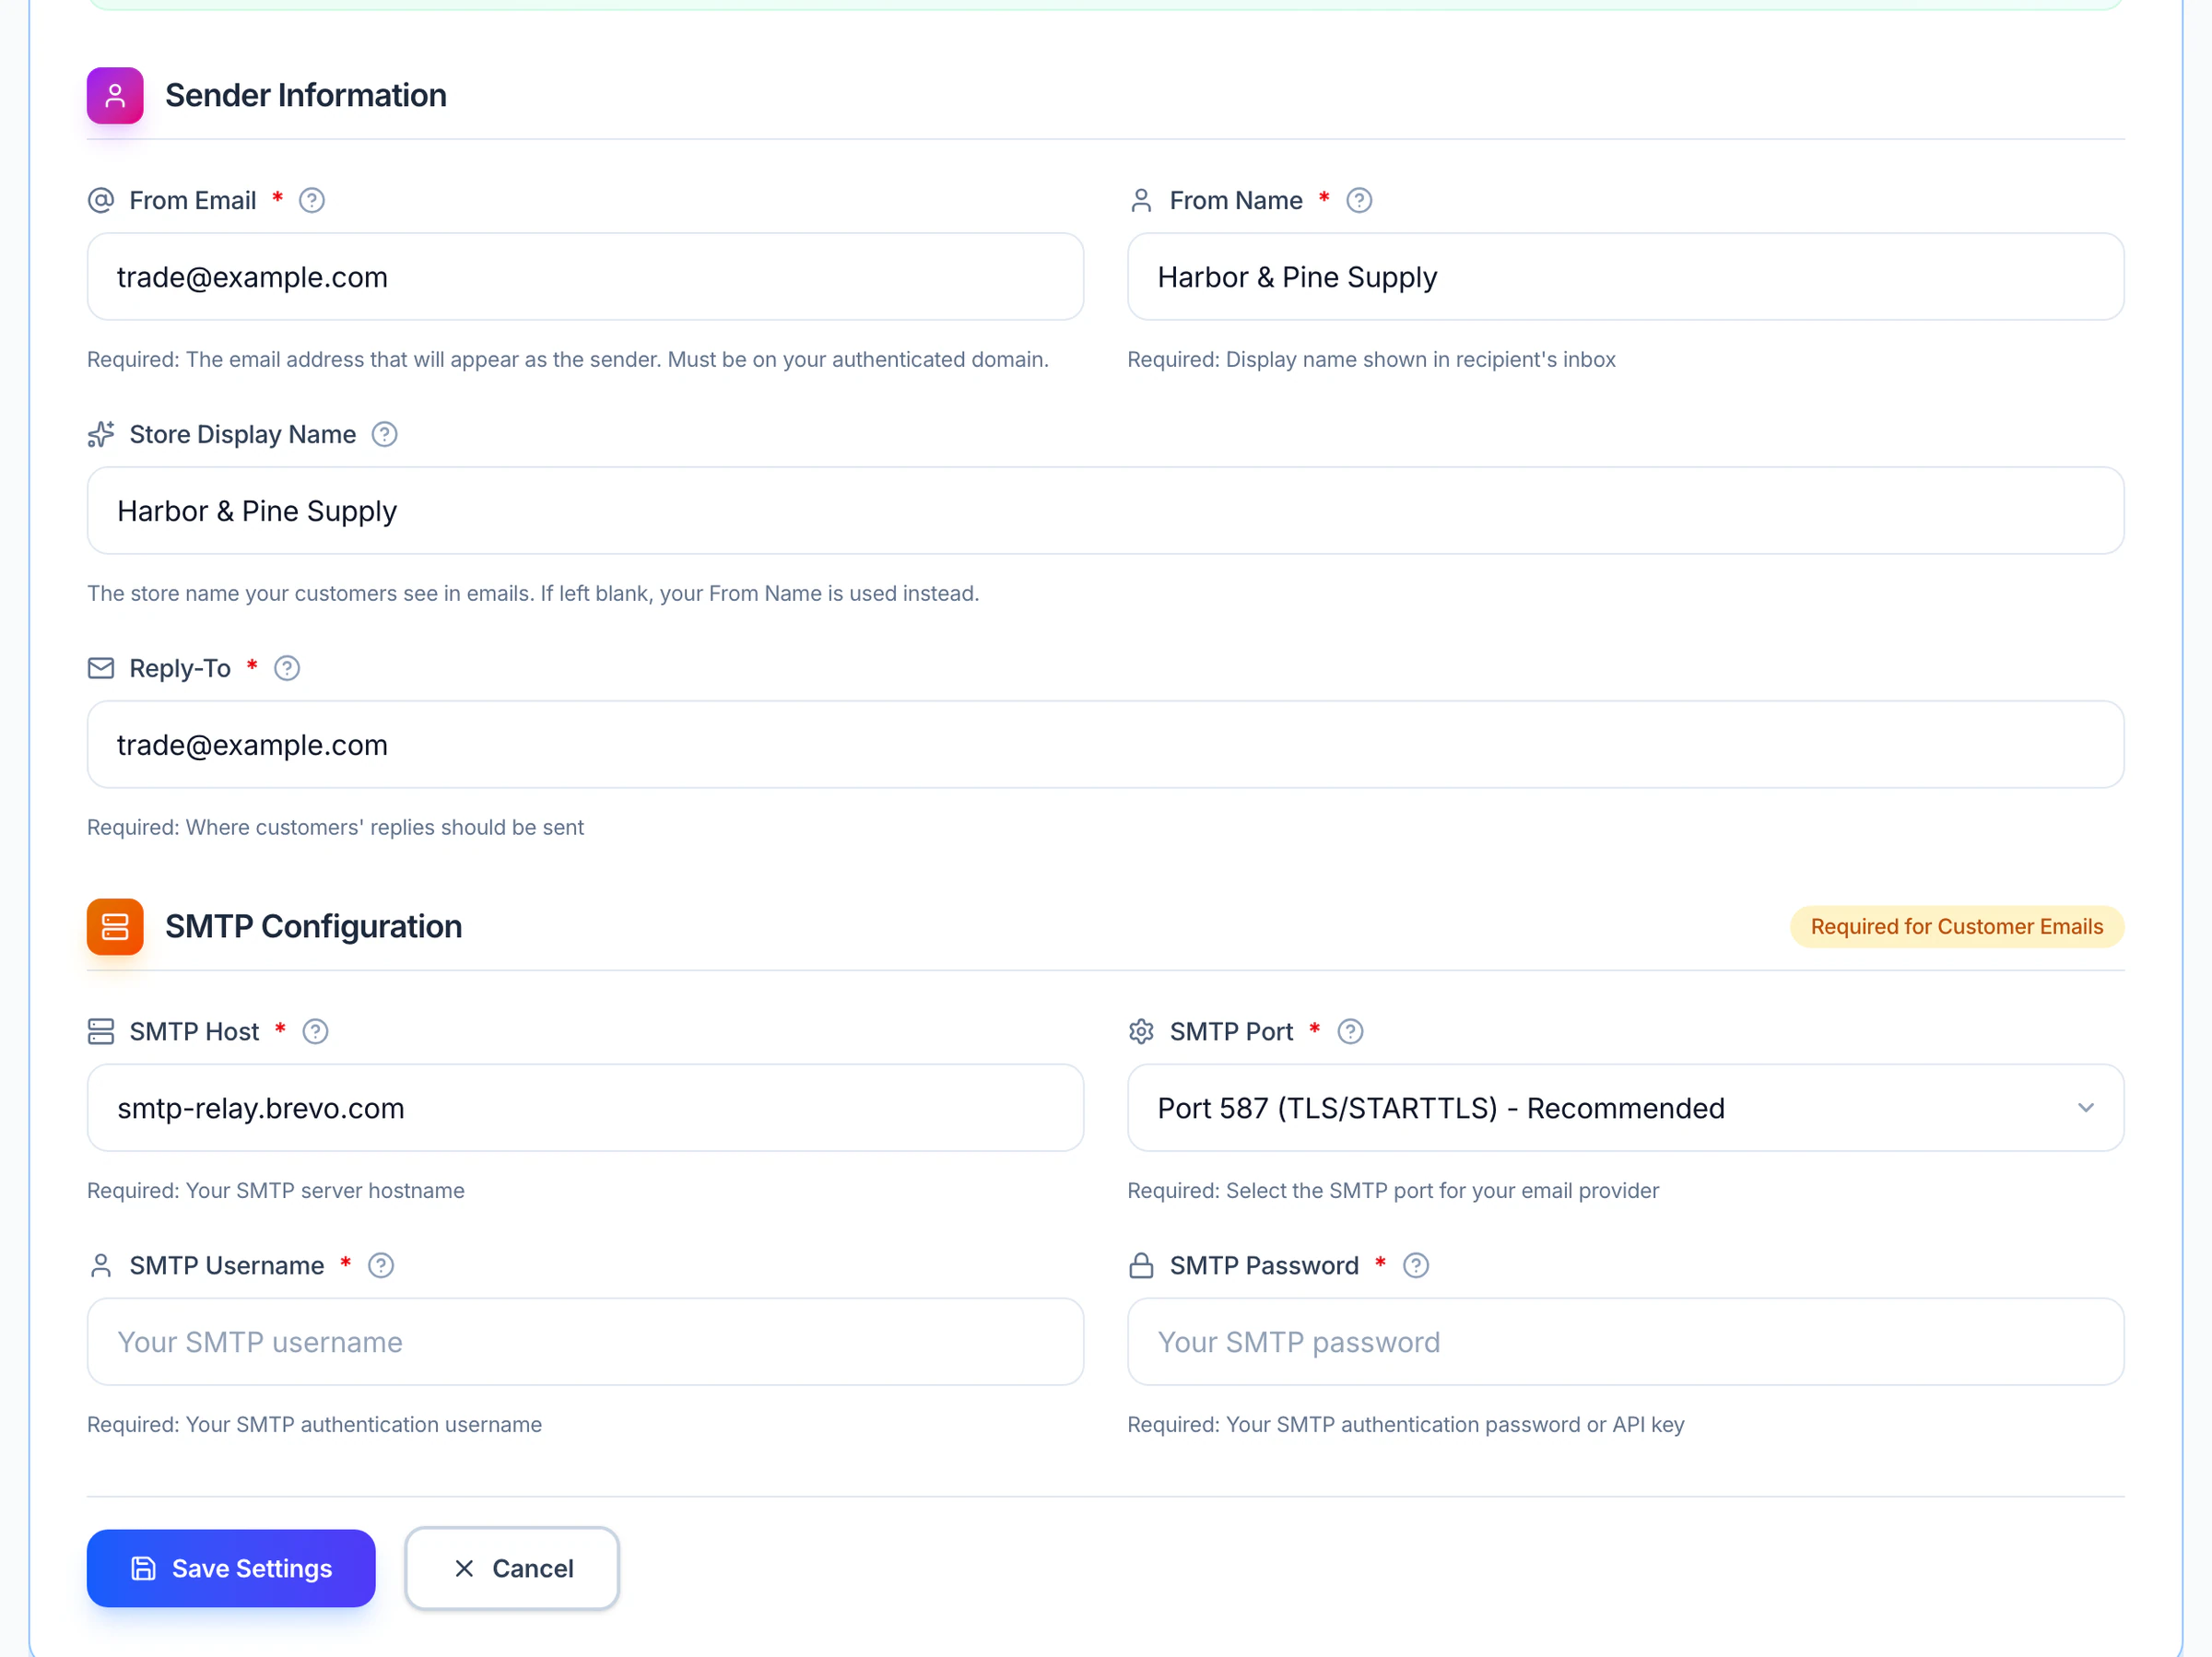
- Enable Customer Emails
- Turns customer emails on. It needs SMTP to be fully configured.
- From Email
- The sender address. Must be on your authenticated domain.
- From Name
- The display name shown in your customer’s inbox.
- Store Display Name
- Optional. The store name customers see in emails. If you leave it blank, your From Name is used.
- Reply-To
- Where customers’ replies go.
- SMTP Host
- Your SMTP server’s hostname, for example
smtp-relay.brevo.com. - SMTP Port
- "Port 587 (TLS/STARTTLS) - Recommended" or "Port 465 (SSL/TLS)".
- SMTP Username
- Your SMTP username.
- SMTP Password
- Your SMTP password or API key.
Store Display Name is the only optional field.
If the app won’t save
These messages tell you what to fix:
- "Please fill in all required fields:" followed by the fields still empty.
- "SMTP must be fully configured to enable customer emails."
- "From Email is required when SMTP is configured."
- "SMTP port must be a valid number between 1 and 65535."
Send a test
Open Email → Templates, choose an email and click "Send test". Enter an address in the "Send Test Email" window and send it.
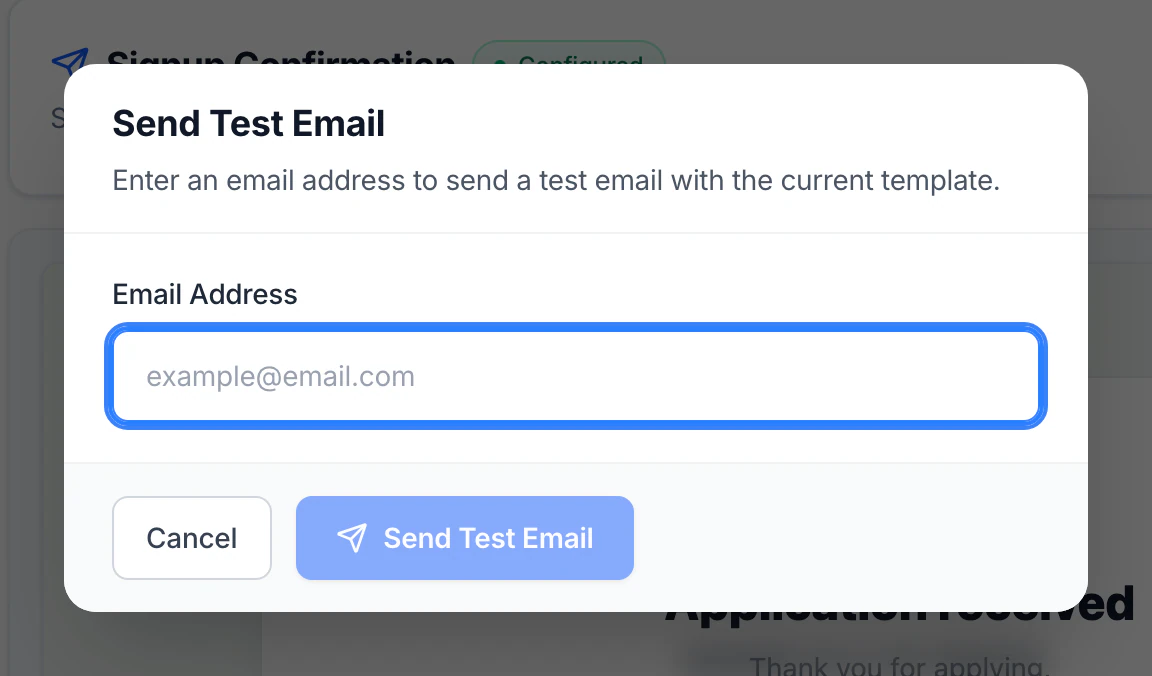
Saving your settings doesn’t test the connection. Send a test to check them.
If the test fails, check the host, port, username and password with your provider, then try again.
Customer emails
There are five. Edit their content in Email → Templates.
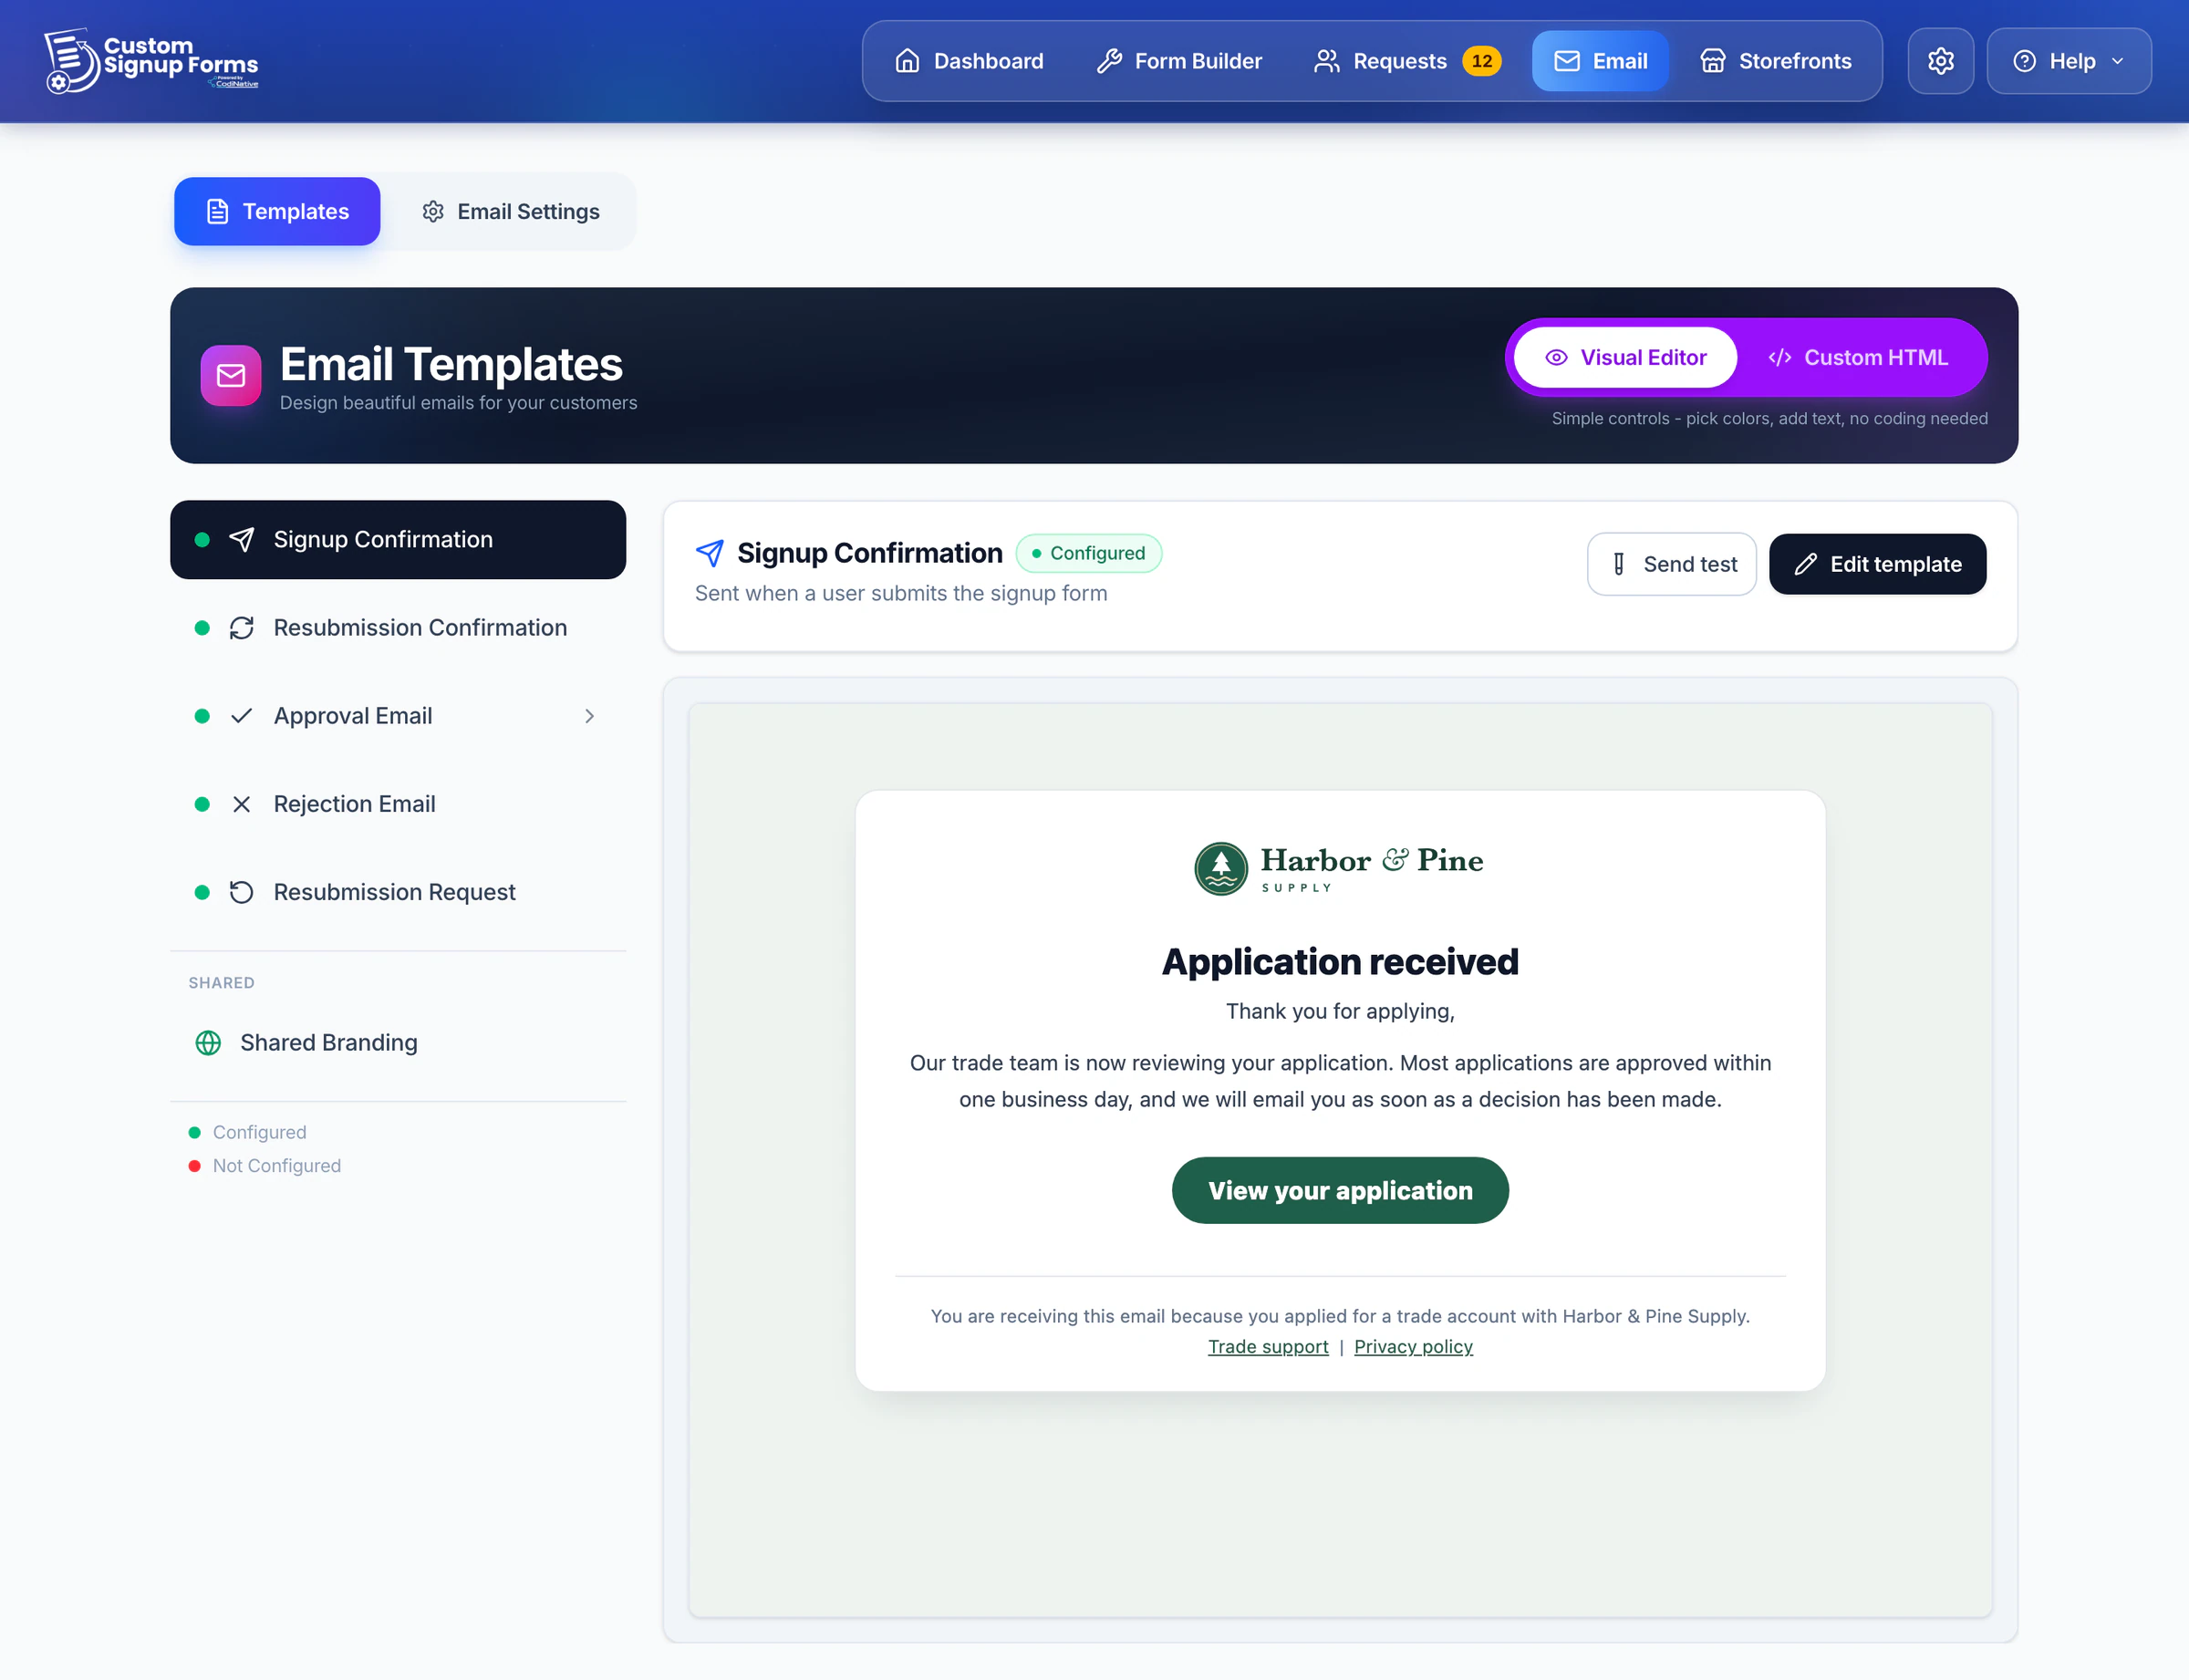
- Signup Confirmation
- Sent when a shopper submits the signup form.
- Resubmission Confirmation
- Sent when a shopper resubmits after being asked.
- Approval Email
- Sent when you approve a request.
- Rejection Email
- Sent when you reject a request.
- Resubmission Request
- Sent when you ask a shopper to resubmit.
Switch any of them off in Settings → Email Sending. The Approval Email can have a different version per customer group, and any email a different version per form answer.
Template variables
Use these in a subject or body. Each one is replaced when the email is sent.
- {{name}}
- The shopper’s name, as entered on the form.
- {{email}}
- The shopper’s email address.
- {{store_name}}
- Your Store Display Name, or your From Name if that’s blank.
- {{platform_name}}
- The same store name as {{store_name}}.
- {{date}}
- The date and time the email is sent.
- {{required_information}}
- In the Resubmission Request: the fields you ask the shopper to fix.
- {{merchant_message}}
- In the Resubmission Request: your optional message.
Notifications
The app can email you when someone signs up. Set it up in Settings → Notifications.
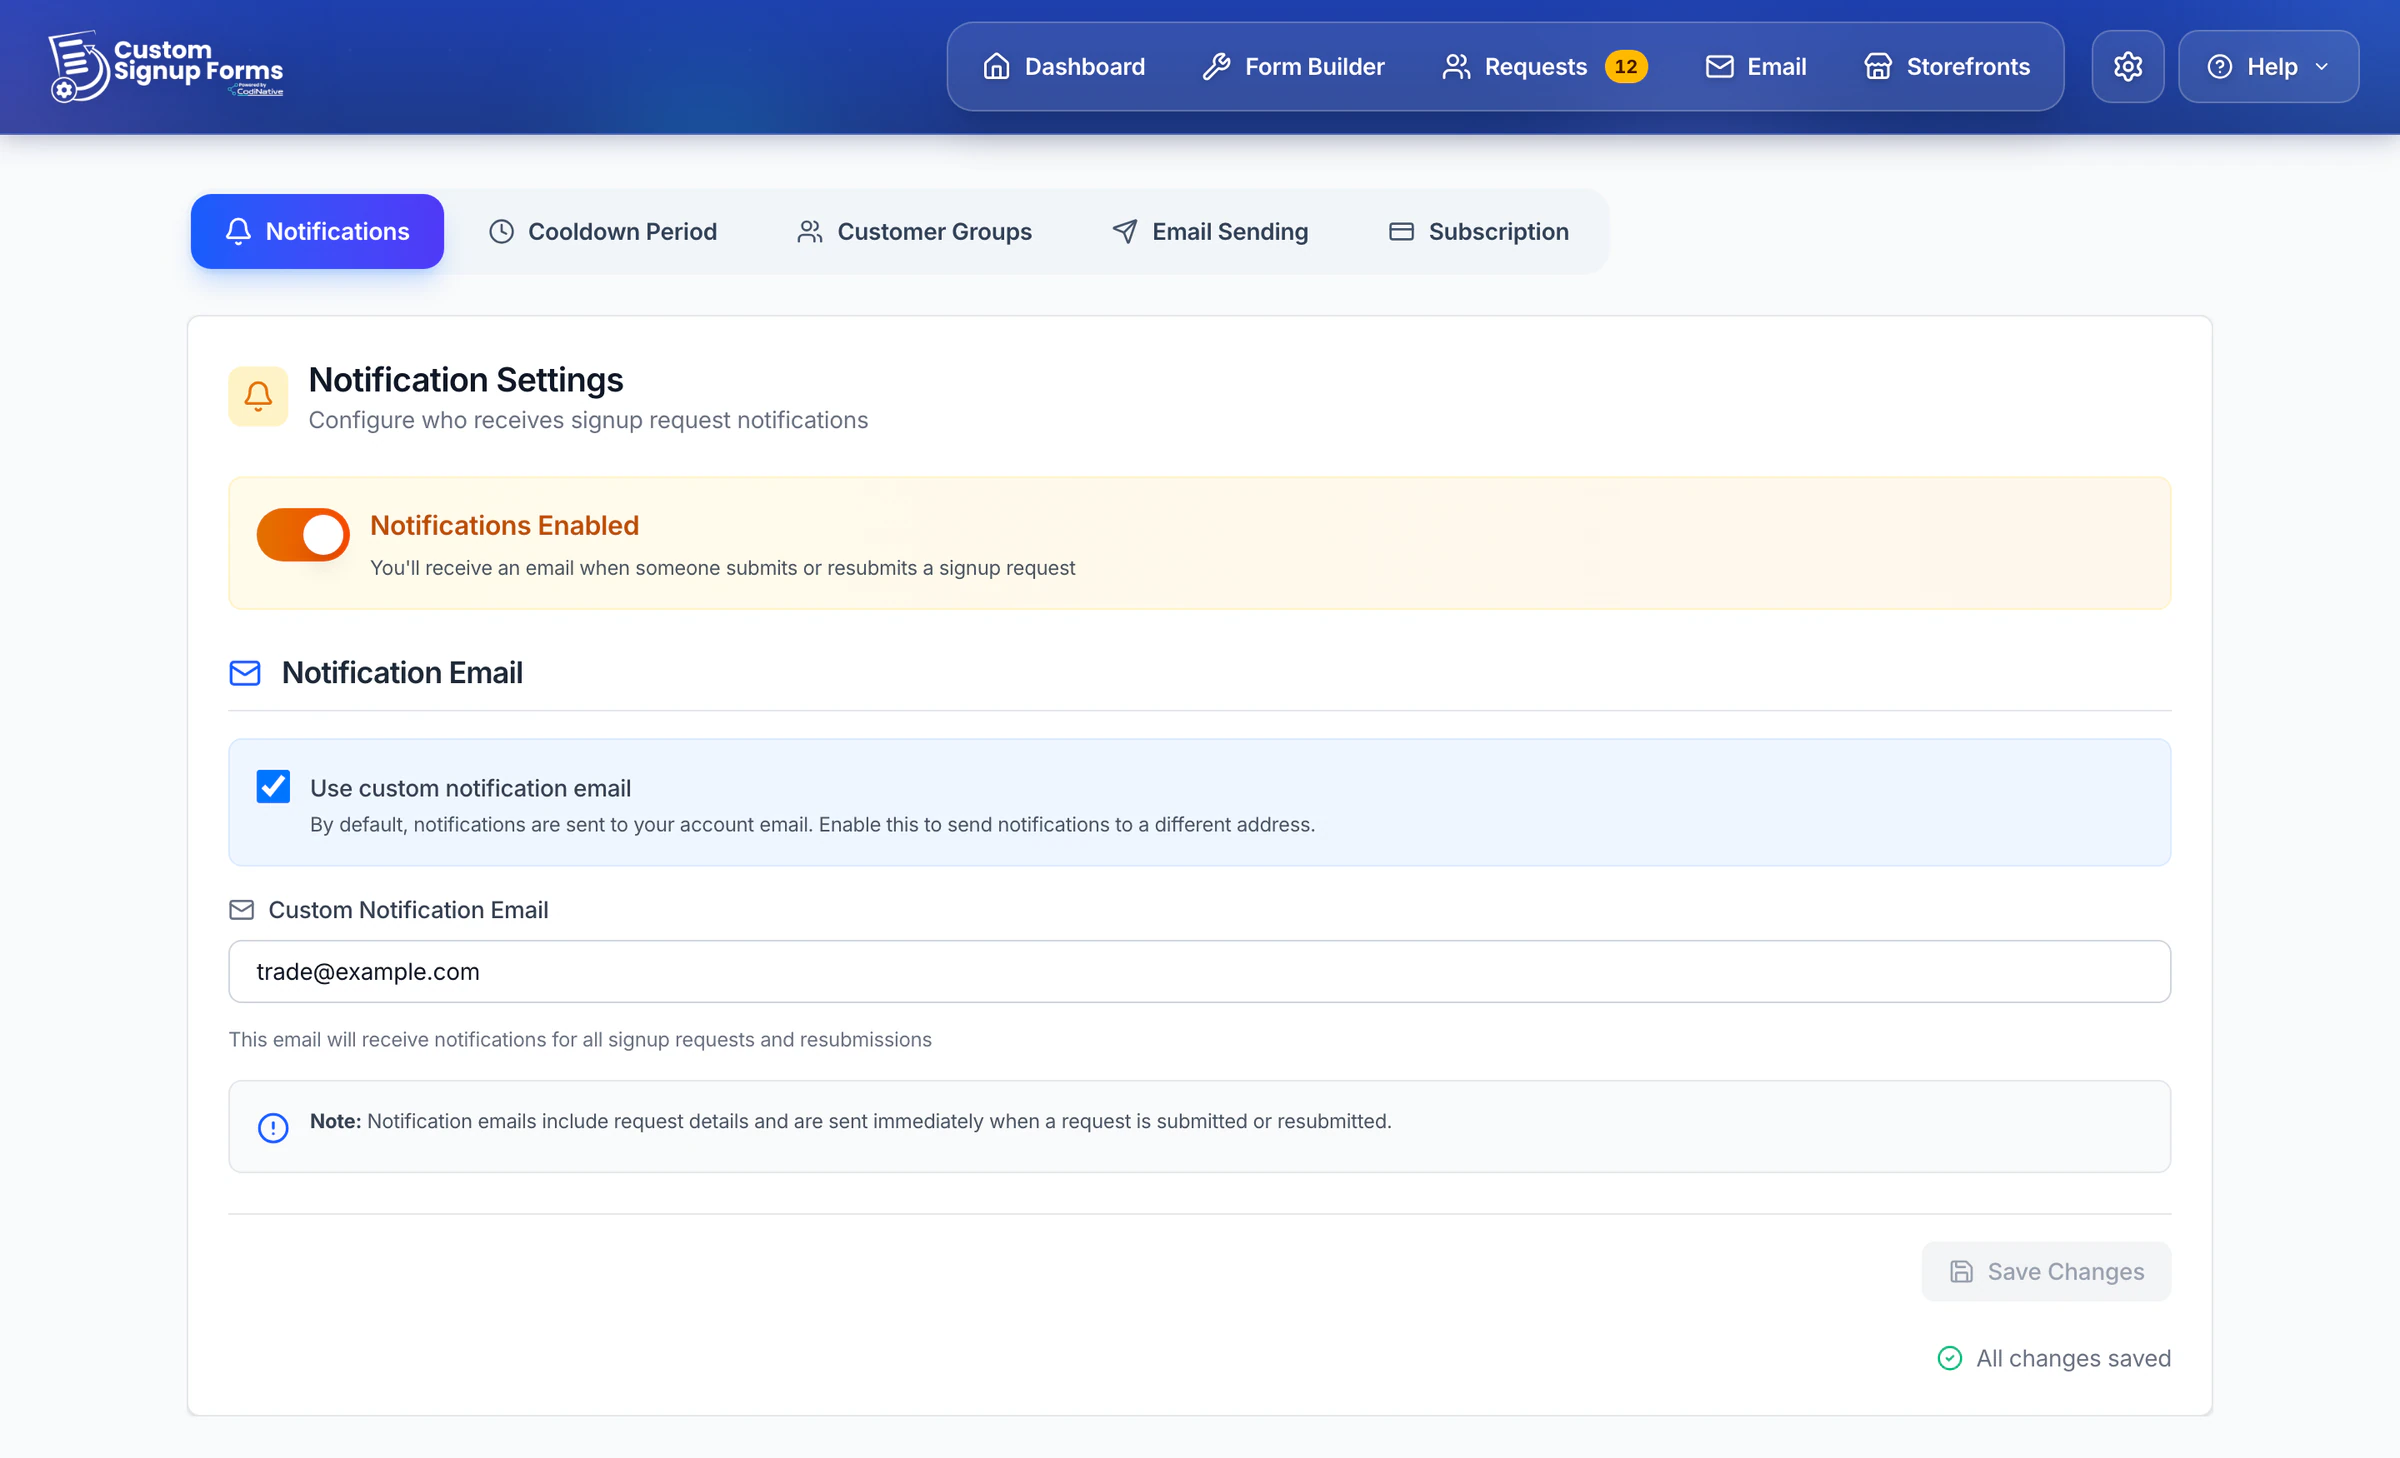
Notifications go to your account email. To use another address, turn on "Use custom notification email" and enter a "Custom Notification Email". They’re sent by the app, not through your SMTP, and are on Standard and above.
Multiple storefronts
With multi-storefront on (Pro and above), a storefront can have its own sender details, SMTP account, templates and Email Sending switches. Pick it in the storefront switcher and tick "Override" on what should differ; the rest keeps following your defaults.
A storefront that overrides only its sender details still sends through your global SMTP account, so a new password there keeps working for it. See the Multi-storefront Guide.