
Multi-storefront Guide
Give each storefront its own signup form, emails and approval settings, all from one app. Anything you don’t override keeps following your defaults.
- 1Turn it onYour default storefront keeps serving exactly as it does today.
- 2Set up a storefrontPick a channel, assign a form, override only the settings that should differ.
- 3Switch it onThe form goes live on that storefront. Switch any storefront off again at any time.
Before you start
Multi-storefront is on the Pro and Enterprise plans. Pro serves up to 3 storefronts at once, your default storefront included. Enterprise serves 4 or more, agreed with you.
The Storefronts screen lists your BigCommerce channels. What a channel can do depends on its type:
- Stencil storefront
- Switching it on installs the form script for you.
- Headless storefront
- Marked "Headless". Your developer swaps your signup form for an empty container and loads the script. See Headless Storefronts.
- Other channels
- Marketplace, POS and marketing channels own their own signup, so a form cannot be delivered to them.
The app needs access to your channels. If BigCommerce refuses it, turning multi-storefront on fails and the app asks you to reinstall, for example "This store has not authorized channel access. Reinstall the app to grant it." Reinstall the app from the BigCommerce Apps page. Your forms, storefront setup and settings are kept.
For review: the full list of BigCommerce permissions multi-storefront needs, and whether existing installs must re-authorize.Turn it on
Open Storefronts and click "Enable multi-storefront". It stays off until you do, and turning it on changes nothing about your default storefront.
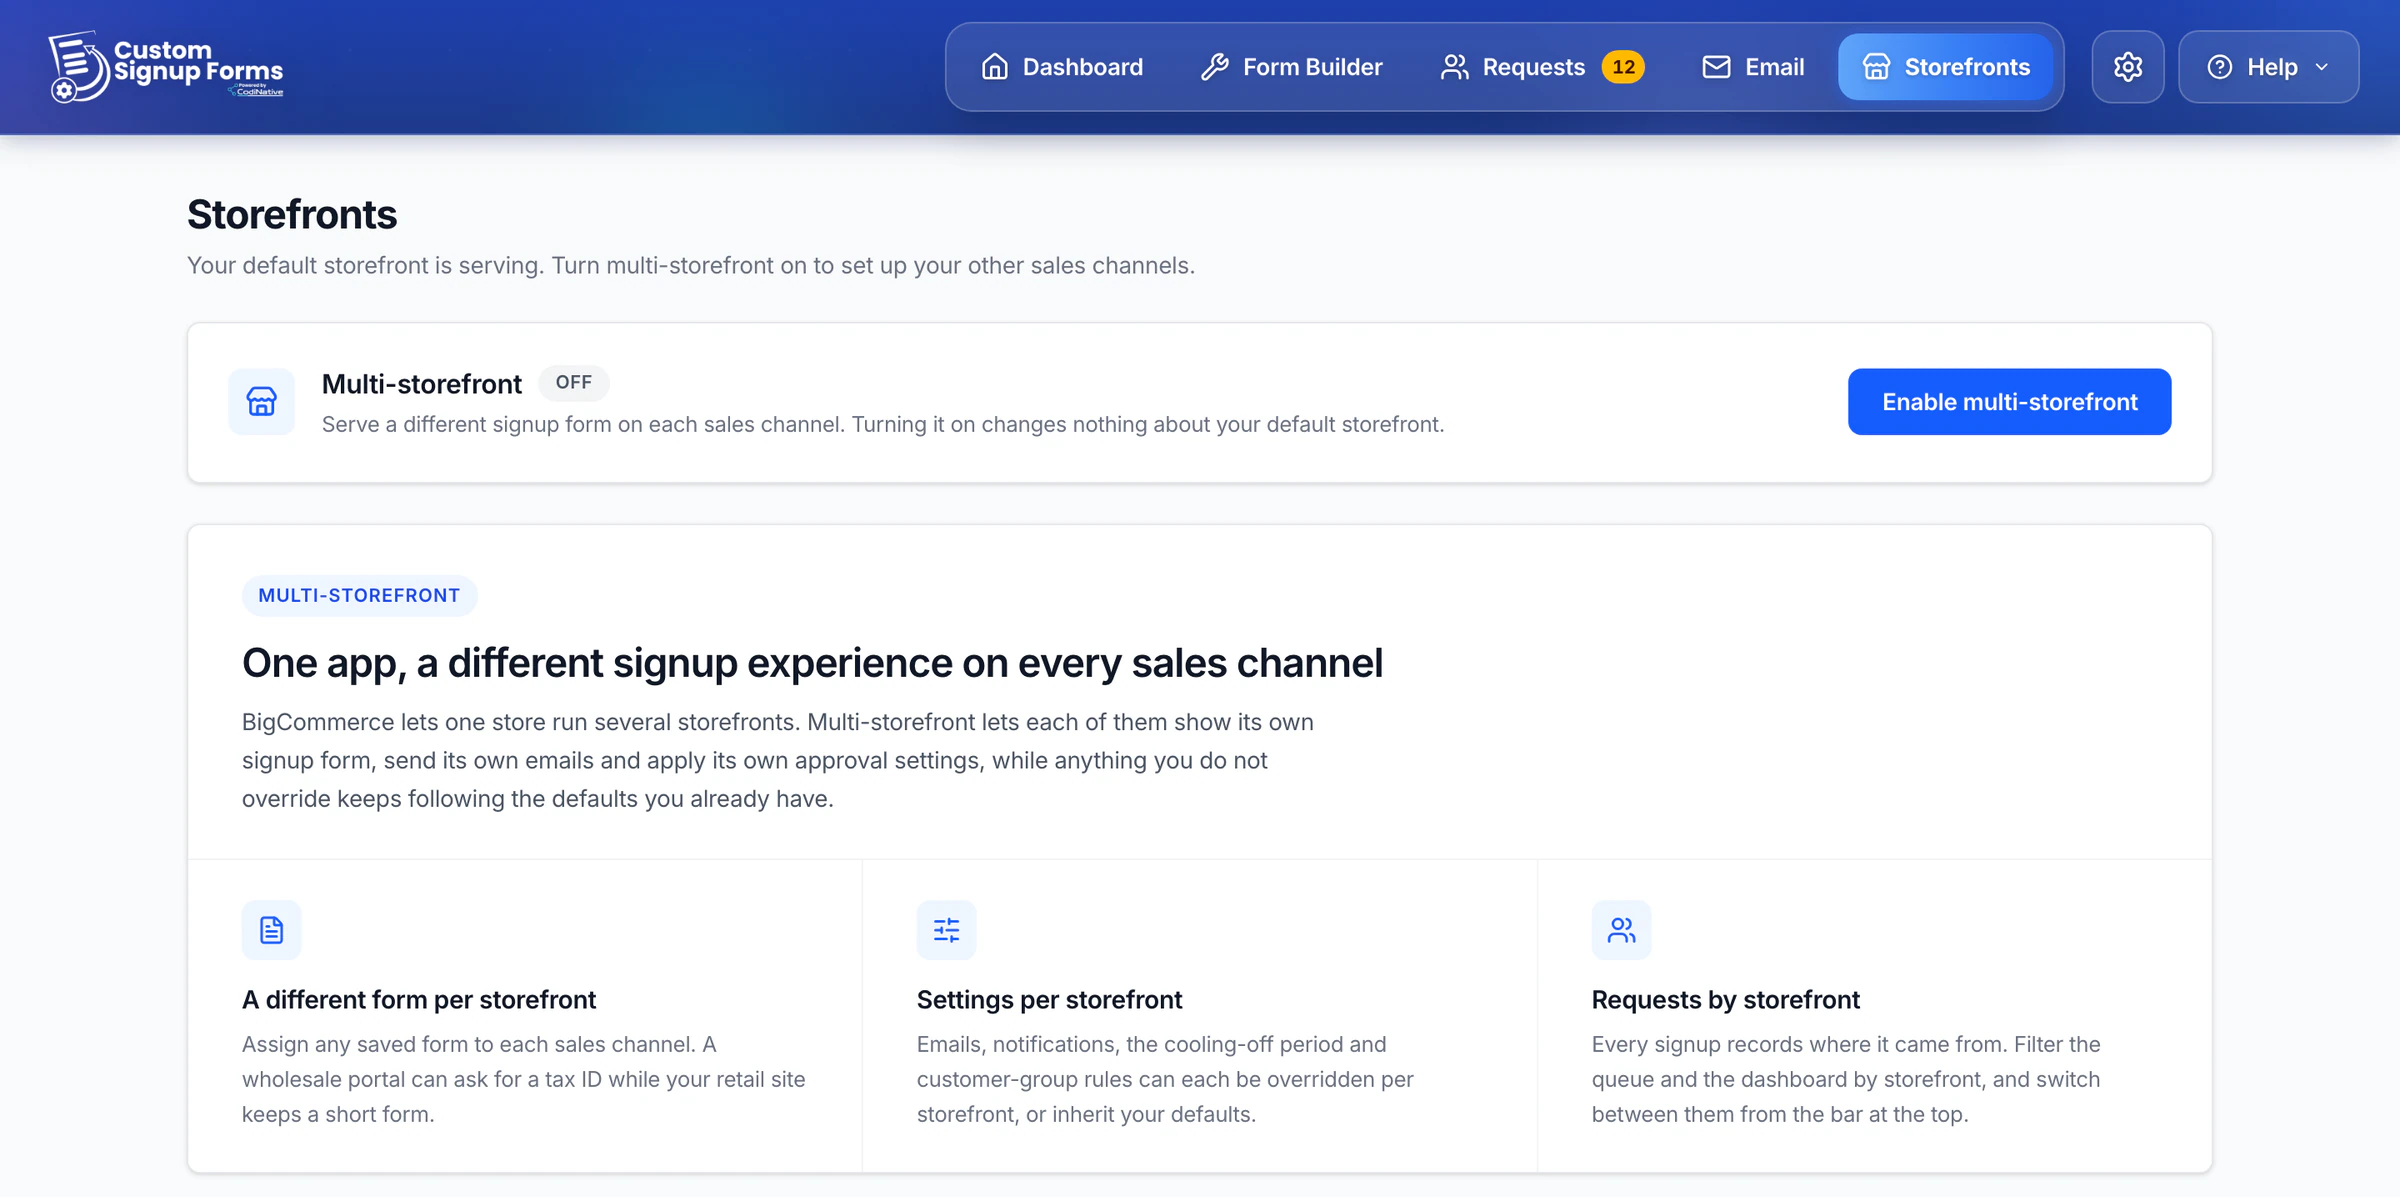
The app checks your channel access with BigCommerce first. Once it’s on, you set up each storefront from the same screen.
Set up a storefront
In the Storefronts list, click "Set up" next to a storefront under "Not set up yet", or open one you’ve set up before. Under "Signup form", open the "Select a form…" menu, pick your form and click "Assign".
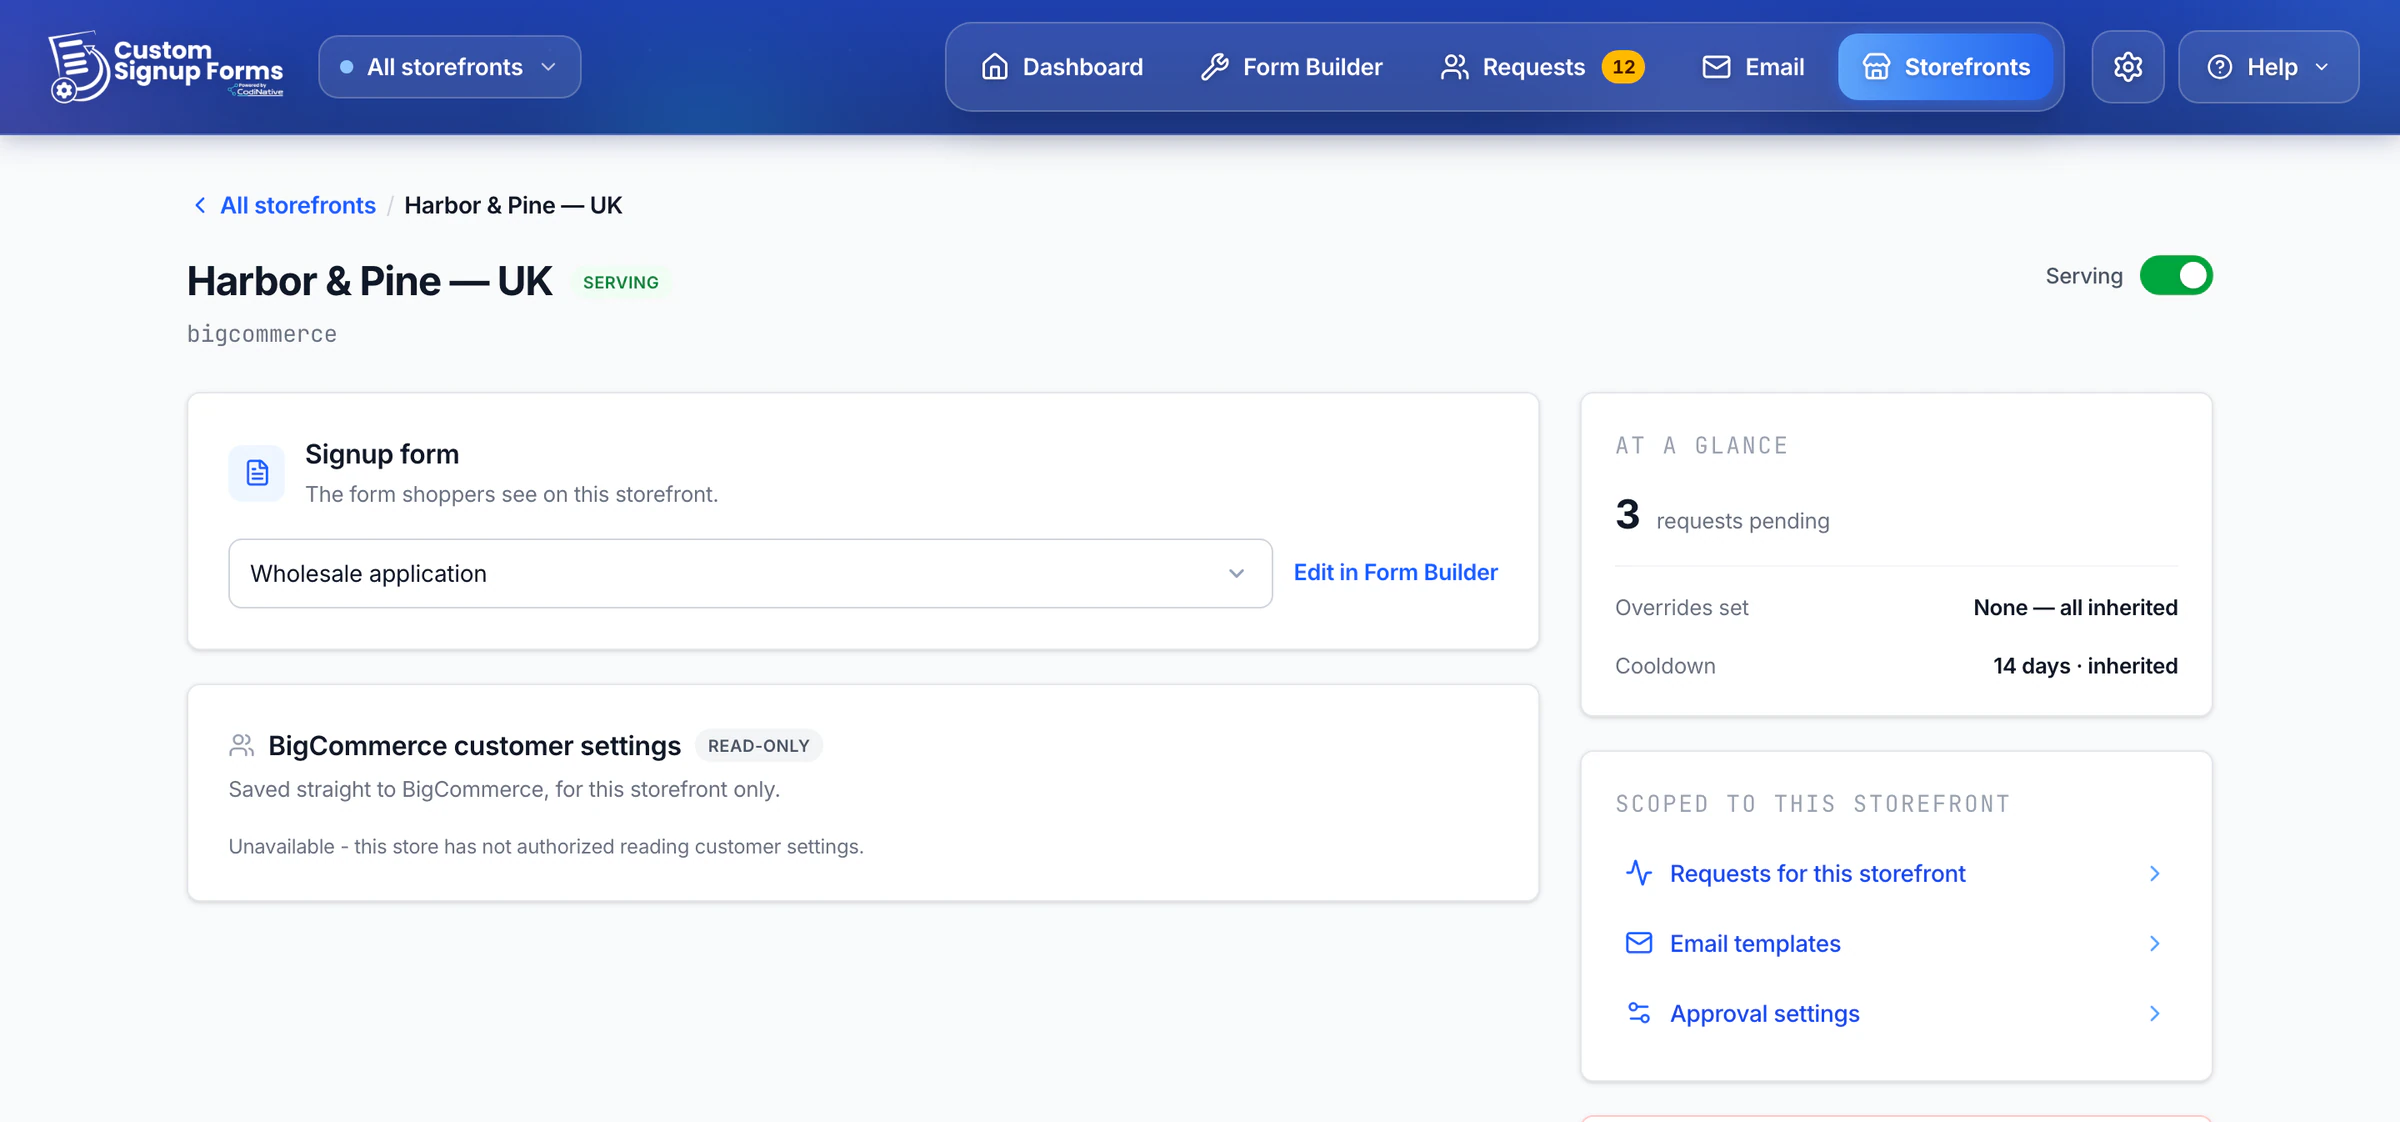
Every storefront picks from the same library of saved forms.
A storefront can’t be switched on without a form. Until it has one, the app shows "No form assigned yet — this storefront cannot be switched on until one is."
Assign one form to several storefronts
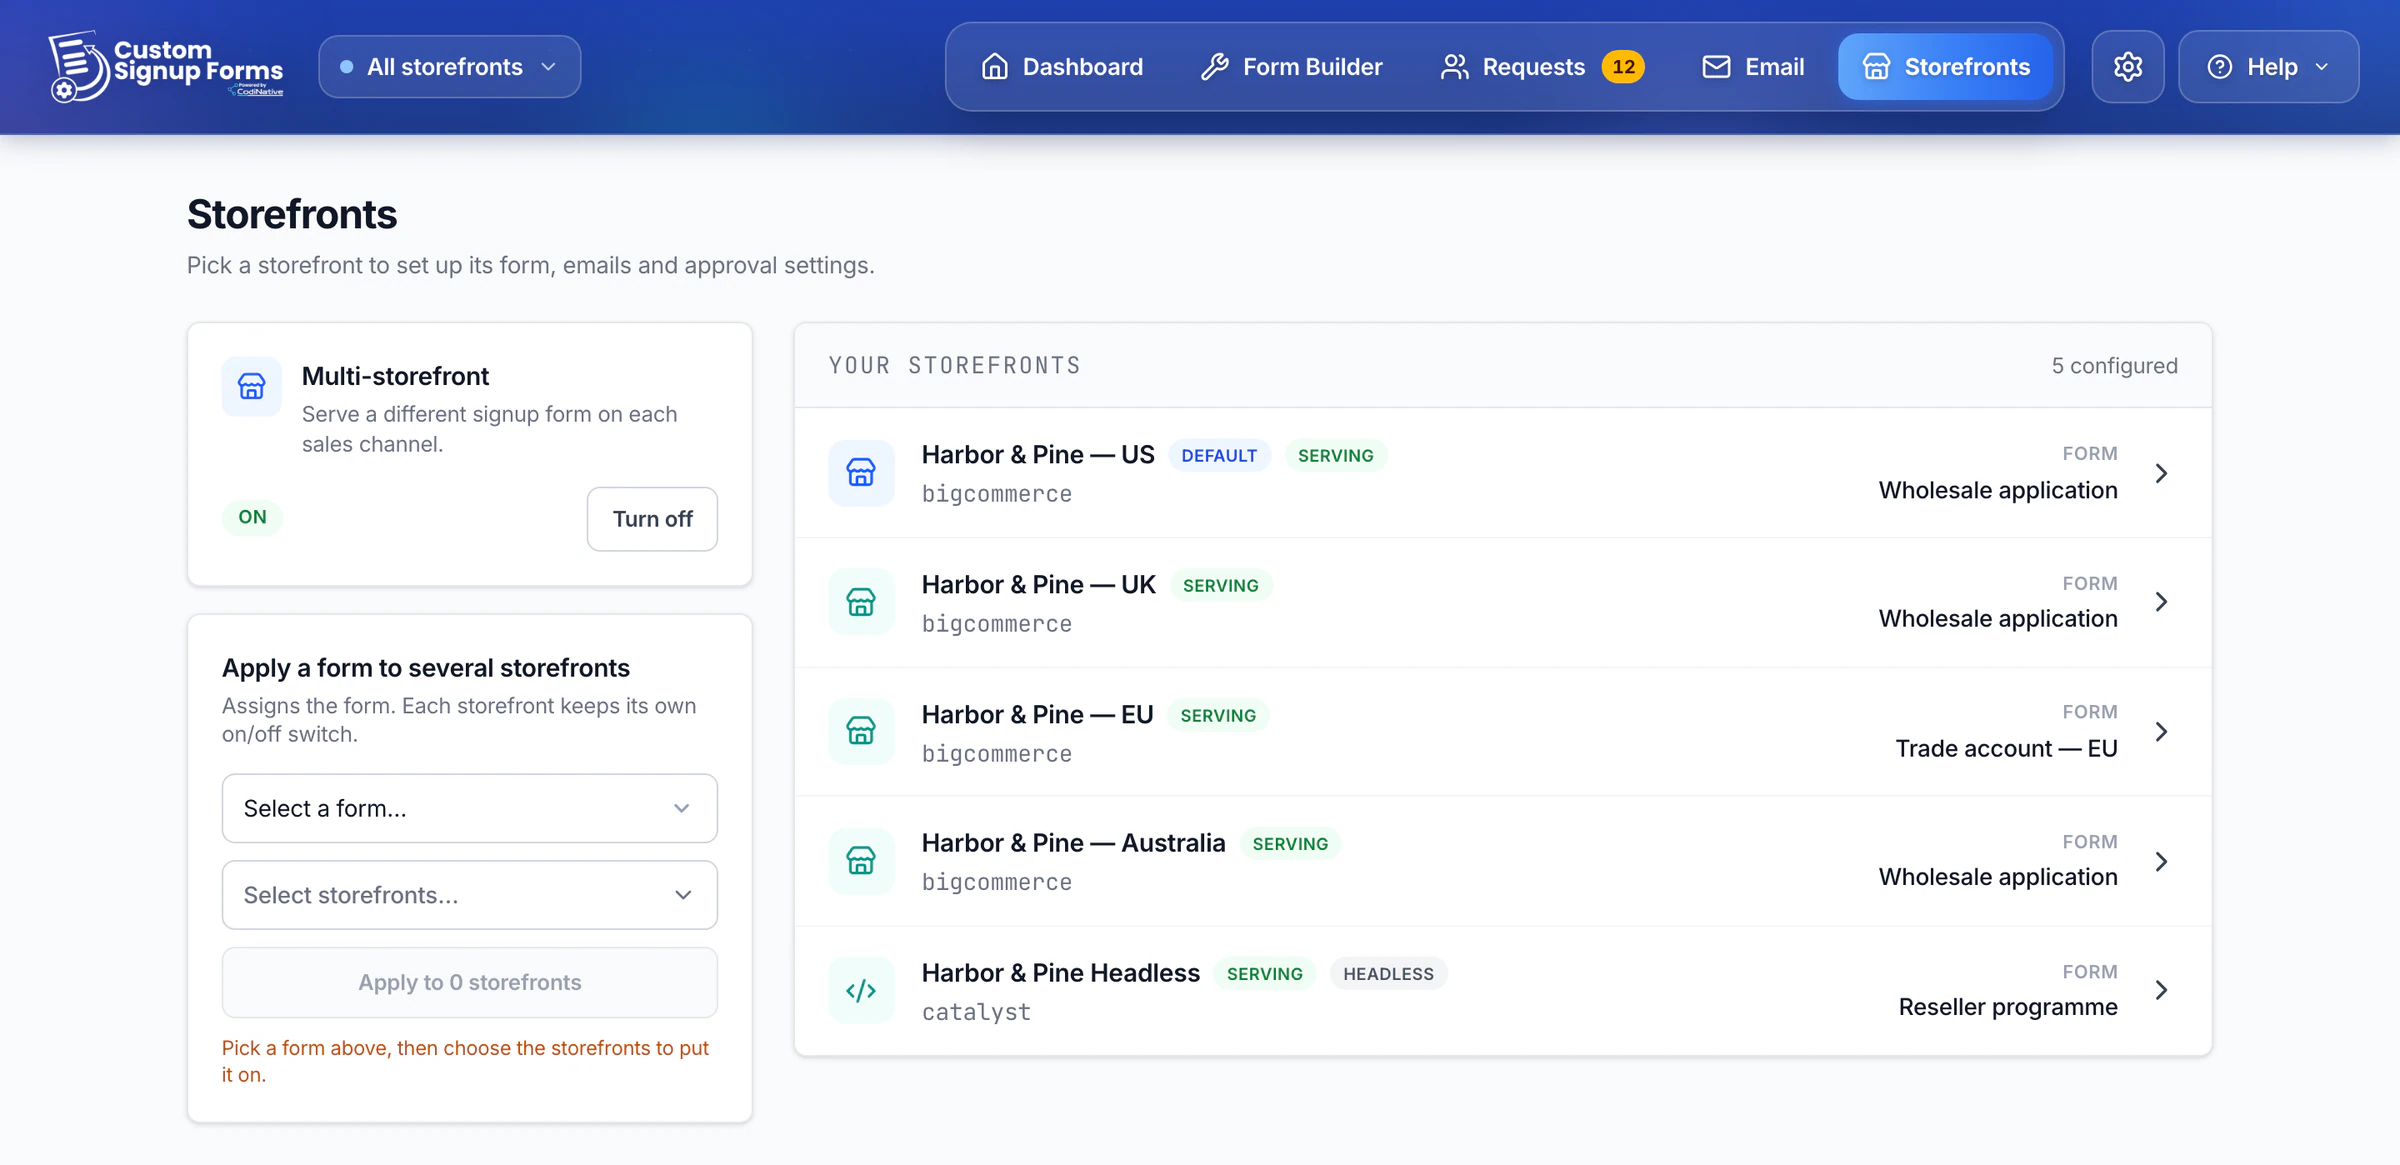
Use "Apply a form to several storefronts" to assign one form to up to 50 storefronts at once. It only assigns the form: each storefront keeps its own on/off switch.
Headless storefronts also need the embed snippet on your site. See Headless Storefronts.
Switch it on
Use the switch at the top of the storefront to start serving your form. On a Stencil storefront, switching it on installs the form script for you.
On a headless storefront, switching it on installs nothing. The form appears once your developer has added the container and the script.
At your plan’s limit you can’t switch another storefront on. On Pro the app shows "You have reached the Pro limit of 3 serving storefronts". Switch one off first, or contact us about Enterprise.
"Remove configuration" is not a stronger "off". It deletes the storefront’s form assignment and the email, notification and cooldown settings you set for it, and can’t be undone. Anything still loading the form on that site then falls back to your default storefront’s form. If you’re not sure the site is gone, leave it switched off instead.
Per-storefront settings
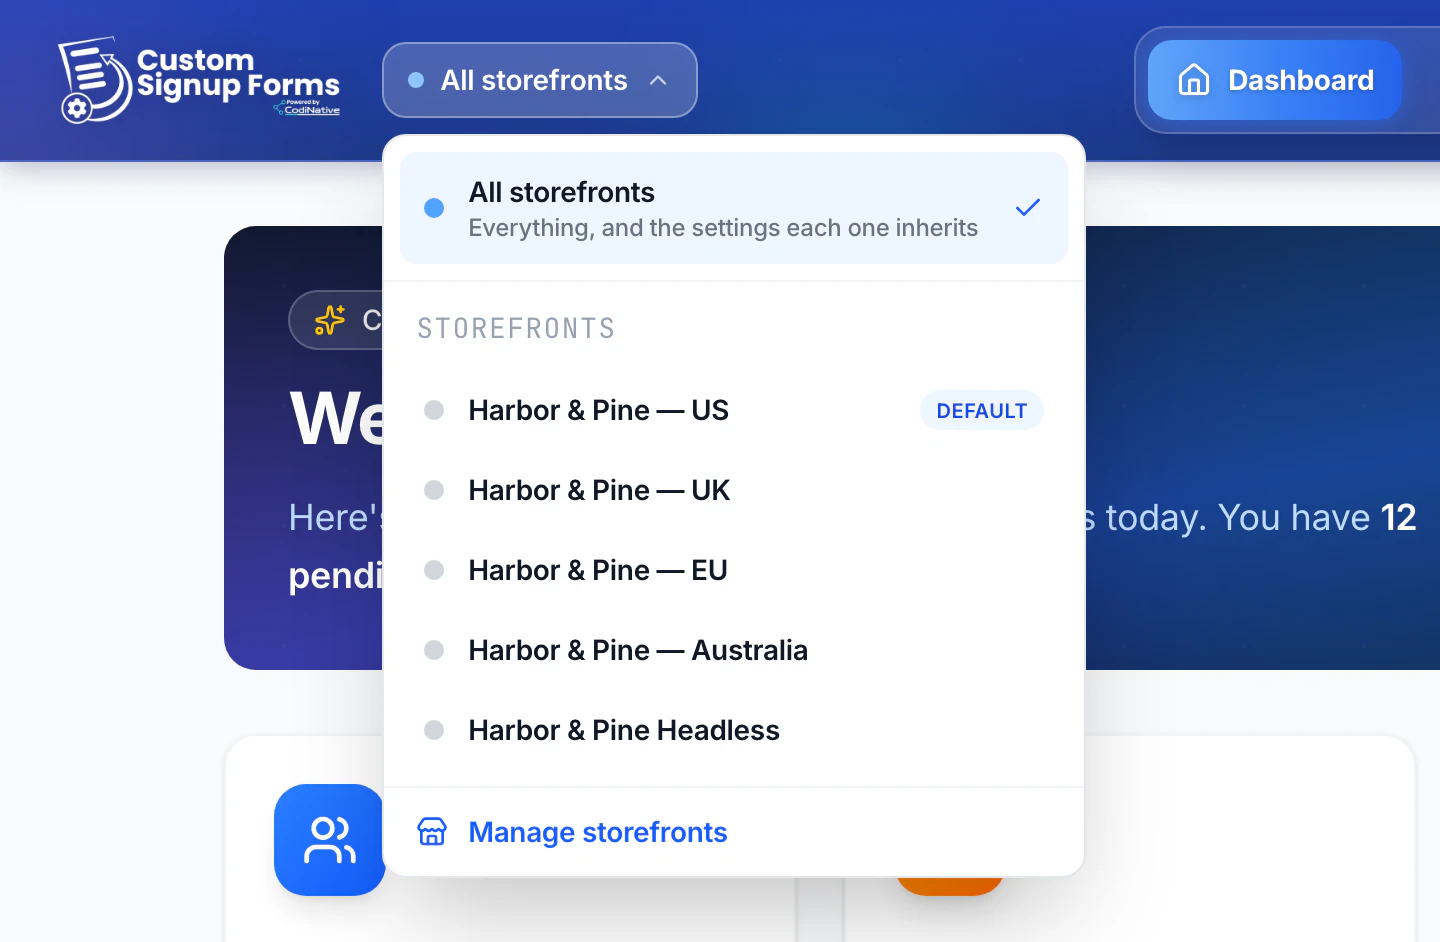
Choose a storefront in the switcher at the top of the app, or "All storefronts" for your defaults. A band above each settings screen says which one you’re editing: "Editing the defaults", or "Editing" followed by the storefront’s name.
With a storefront selected, each setting has an "Override" checkbox. Leave it unticked and the storefront keeps following your defaults, including later changes. Tick it to give that storefront its own value; no other storefront changes.
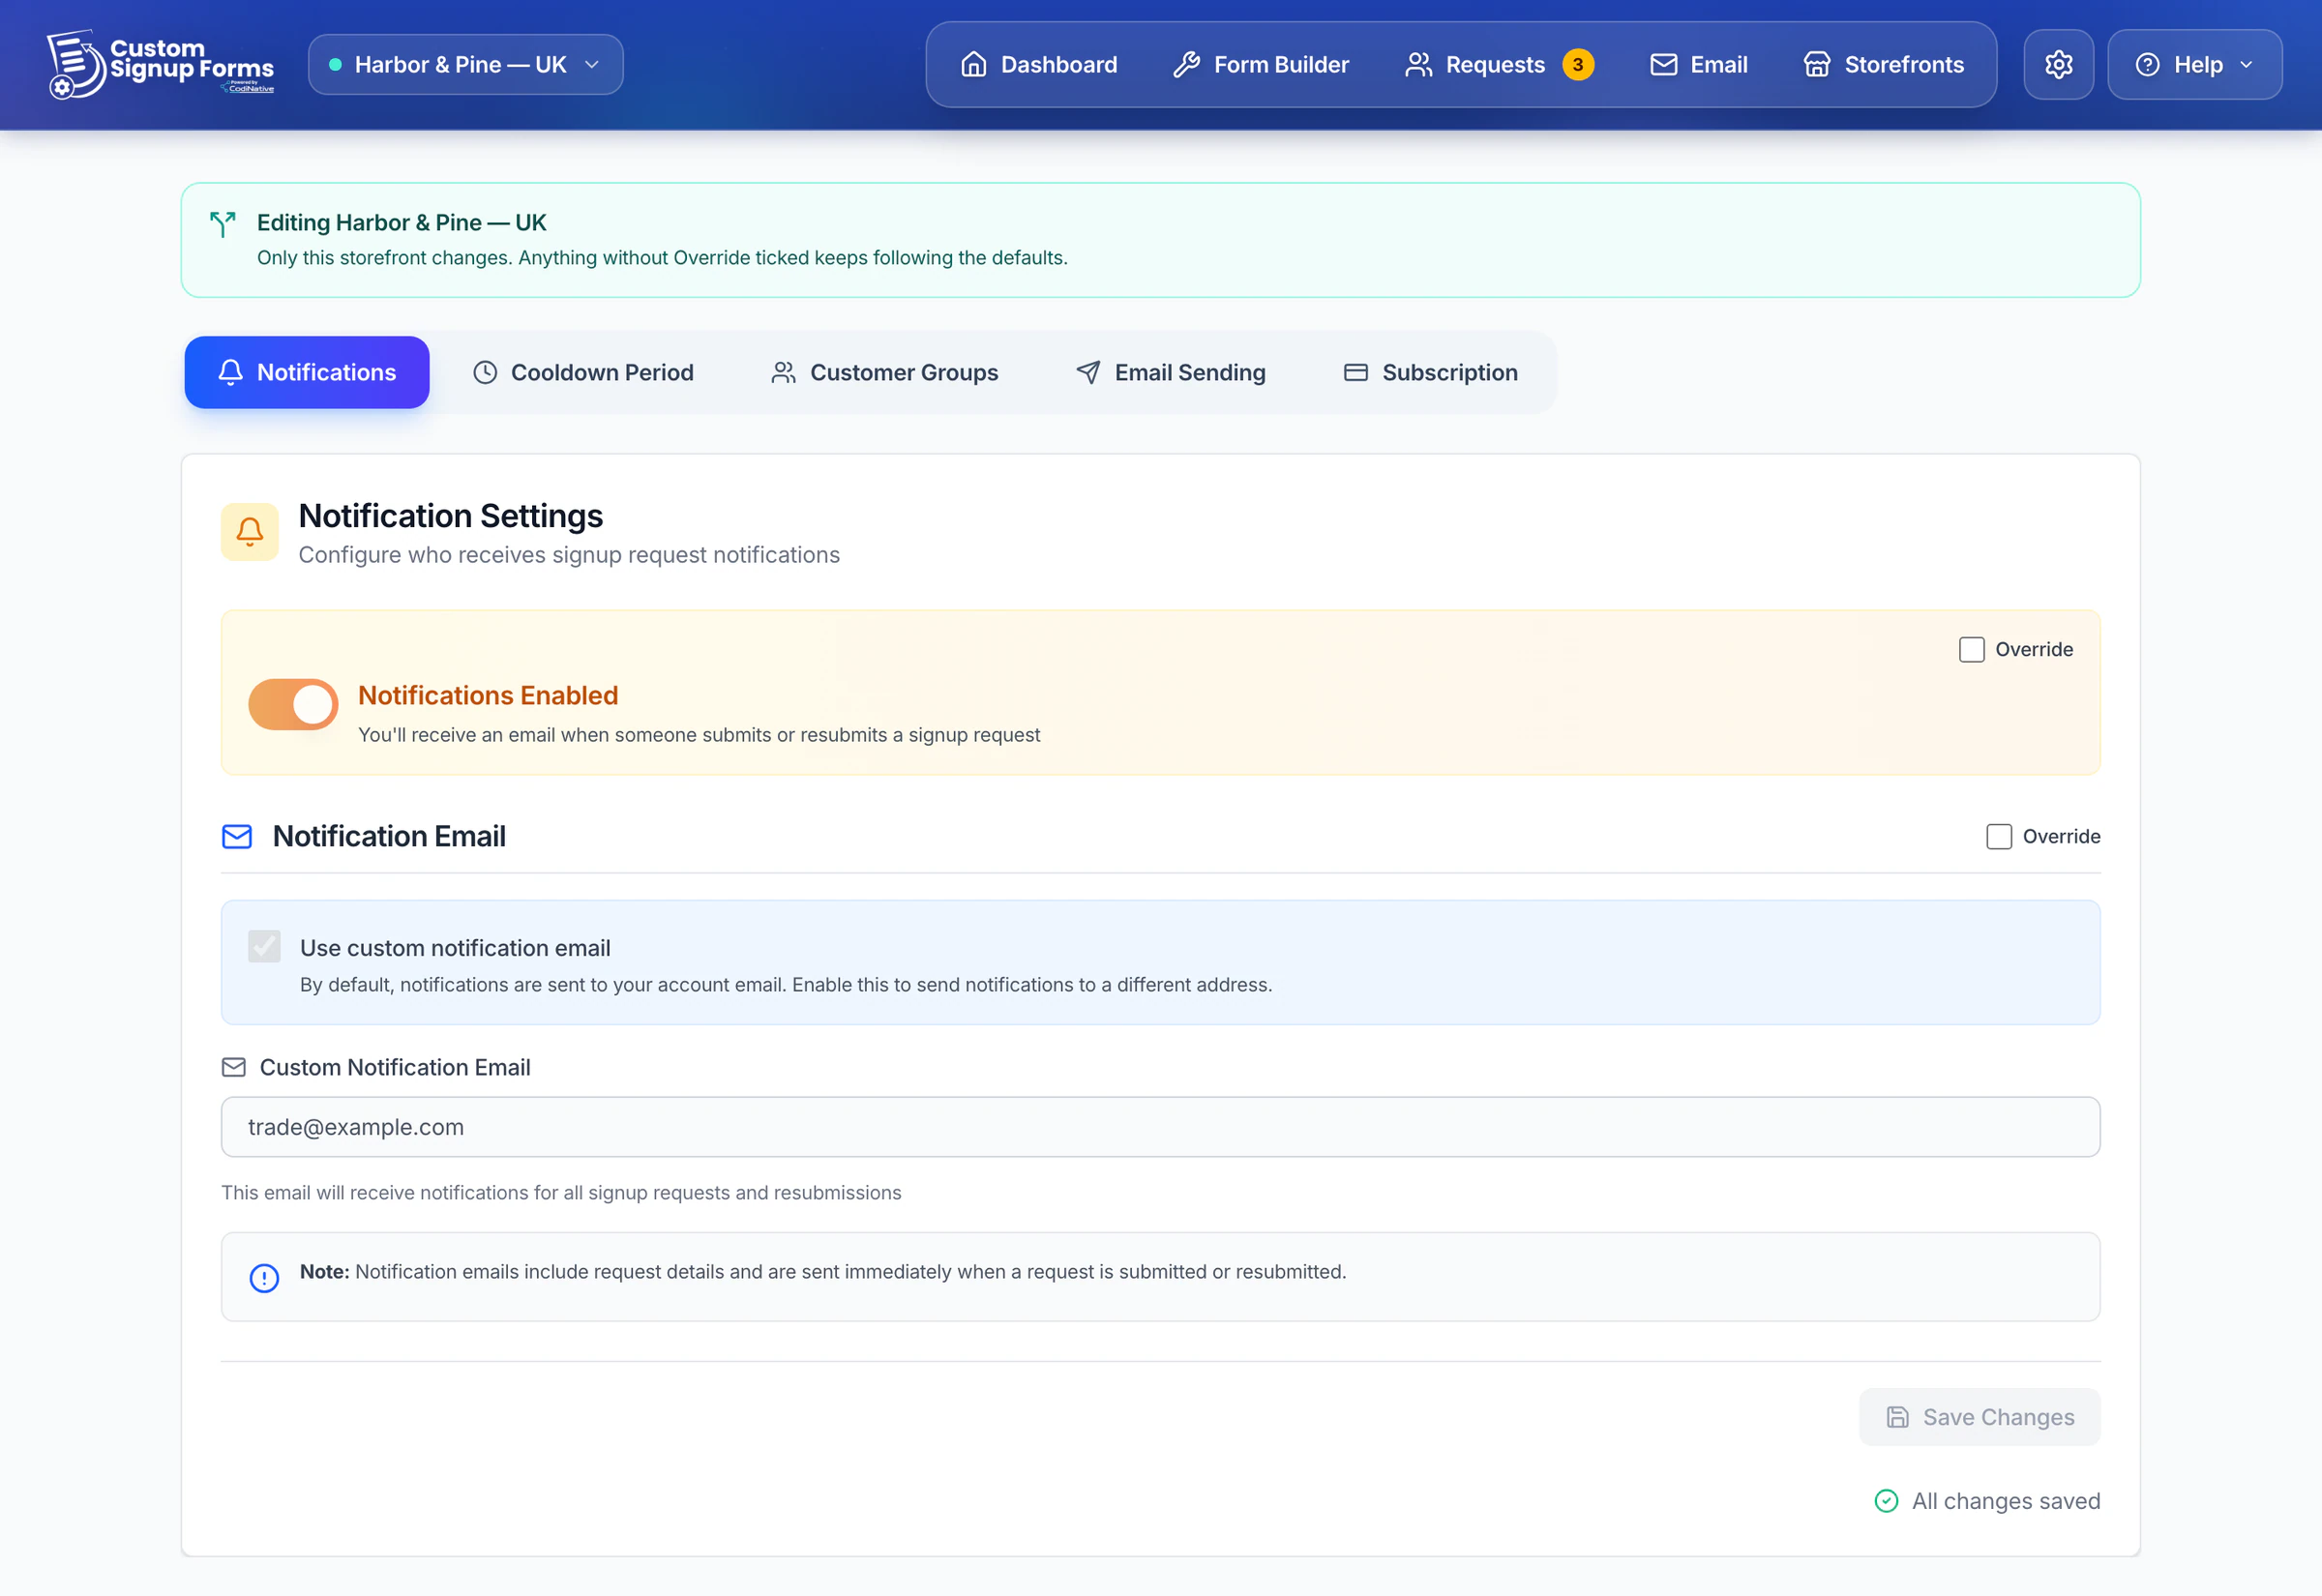
A storefront can override:
- Sender details (From Email, From Name, Reply-To, Store Display Name) and the SMTP account.
- The five customer email templates, and their versions per customer group and per form answer.
- Email branding: logo, banner and social links.
- Which emails are sent, in Settings → Email Sending.
- Team notifications.
- The rejection cooldown.
- Customer-group rules.
Forms aren’t overridden: there is one shared library, and each storefront is assigned a form from it.
Requests by storefront
Every signup records the storefront it came from. Filter the request queue and the Dashboard by storefront, or switch between storefronts from the bar at the top.
Turn it off
Click “Turn off” on the Multi-storefront card and confirm. Every storefront except your default stops serving a form right away, and the scripts we installed on them are removed.
Headless storefronts work slightly differently, because you pasted their snippet into your site yourself. We can’t remove it, but it stops showing a form and leaves its spot on the page empty. Remove the snippet from your site if you no longer need it, or keep it: it works again as soon as you turn that storefront back on.
Their form assignments are kept, but each storefront comes back switched off, so you turn them on again yourself.
If you move to a plan without multi-storefront, it switches off when the change takes effect. Other storefronts stop serving, their forms and settings are kept, and all signup requests go into one queue with your default settings. See Plans and Billing.